All-In-One video library & player for iOS/macOS/tvOS
...
Best local and net disk movie/tv player on Mac, creating a local personal media library.
Price reduced to Free Trial!
  • $29.99
  • 0
How to Zip and Unzip Files on your Mac
  • Oka Assist
  • 2026-02-12 18:17:06


How to Zip and Unzip Files on your Mac

Reading this article will help if you have the questions below when using Mac.

Why can't I unzip a file on my Mac?

How do I unzip files on a Mac for free?

Where is the Unzip button on my Mac?

How do I open a zip file on my Mac?

How do I open a RAR file on my Mac?

How to open a 7z file on my Mac?

How to open an EXE file on Mac?

The Archive Utility of Mac OS

Unlike Windows OS, there is a default context menu with zip/unzip; right-click the file, and you will find the unzip menu; in Mac OS, you only can see the compress menu to zip the file. There is no unzip menu. Unzipping files on an Apple Mac computer is super easy.

​ 1. Double-click the zipped file.

​ 2. The file will be unzipped by a system default App - Archive Utility and the file will be decompressed to the same folder as the compressed file.

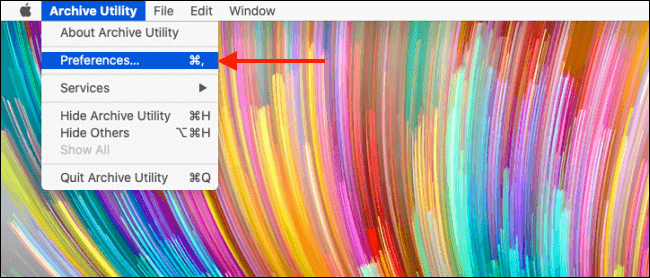
​ 3. You might want to change the default unarchived folder, find the Archive Utility App in your system, and change it in the preference.

Suppose you want to zip a file to save more disk space or send a package of files to other people. Follow the below steps on your Mac:

  1. Select the file or folder you want to compress.
  2. Right-click, then you will see the right menu; just like windows, select the compress … menu.
  3. Then it will compress a .zip file, either an Archive.zip or the name of your selected file or folder.

Third-Party Softwares

Why do you need a 3rd party App when Apple provided one in Mac OS? The same answer as you use WinZip and WinRAR in windows rather than the native App in windows OS. The alternative unzips App provides more features and formats like 7z, RAR, 001 (Multi-Volume zip/rar), etc. Here is the best Zip & Unzip App in Mac AppStore.

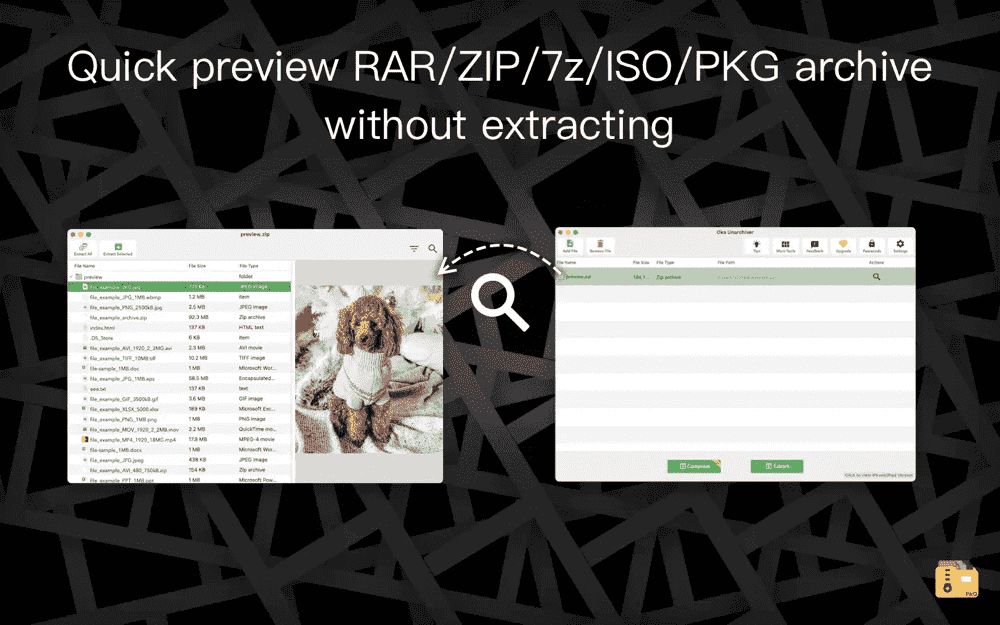
​ 1. Oka Unarchiver is the tool that simultaneously provides the unarchiver & archiver. So far, it is the best alternative App to WinRAR if you are moved from windows.

Oka Unarchiver can zip or unzip files on the Mac and open any archive in seconds. It is the only App you need to open RAR on the Mac. It even supports a password book to help you unzip files with a password. You don't have to extract the whole thing if you only need a few files or folders from a more extensive archive like a RAR Mac or any other compressed file format. Just drag the files you need from the Oka Unarchiver window to any Finder window or the desktop.

Key Features:

  • Password protection with AES-256

  • Preview/Modify existing archives

  • Drag and drop archives

  • Multi-volume archive support

  • System right menu support

    Unarchive From:

    Popular formats: Zip, RAR, 7z, Tar, Gzip, Bzip2, LZMA, XZ, CAB, MSI, NSIS, EXE, ISO, BIN, MDF, NRG, CDI, Split files

    Old formats: Stufflt, Stufflt X, DiskDoubler, Compact Pro, Packlt, Cpio, Compress (.Z), ARJ, ARC, PAK, Ace, Zoo, LZH, ADF, DMS, LZX, PowerPacker, LBR, Squeeze, Crunch

    Unusual formats: XAR, RPM, Deb, Ar, ALZip, WARC, NSA, SAR, NDS, SWF, PDF

    Archive To:

    ZIP

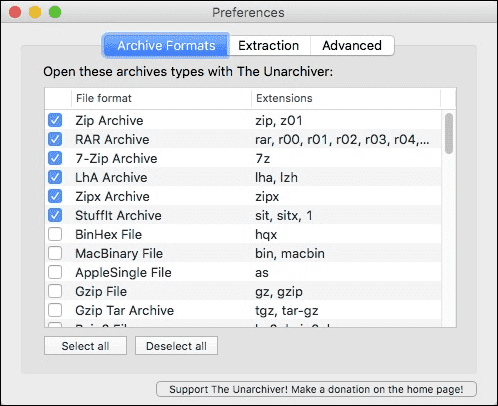
​ 2. The Unarchiver is the most famous app for people who want to unzip files, and MacPow acquired it in 2012, so it has been the most stable unzip App on Mac for many years. But it only provides the unzip feature, just like what is mentioned in the name. To archive a file or folder, you need to install other Apps.

​ 3. Winzip/Betterzip, These two apps are well-known as Windows apps. It is not Mac friendly App; for Mac, if you want to install a paid version of this kind of App, Keka is the one you should try.

Keka can compress files by dragging and dropping your desired files and folders to Keka in the Dock. You can drop as many as you want at once, and all of them will be archived into one compressed file.

Keka

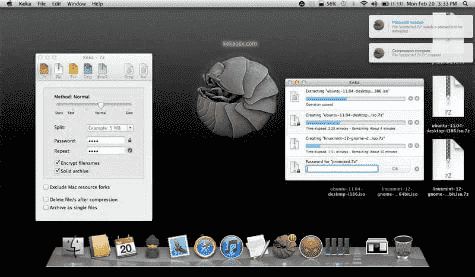
​ The Keka main window lets you choose your desired compressed format, like 7z, Zip, Tar, Gzip, or Bzip2. If you’re compressing a big file, you can split it into parts by just selecting the size you want, in Bytes (B), Megabytes (MB), or Gigabytes (GB). With 7z and Zip, you will have the opportunity to create password-encrypted files to protect your privacy better. You can create archives that look clean in non-Mac systems, like Linux or Windows.

Unarchive From: RAR, 7z, Lzma, XZ, Zip, Tar, Gzip, Bzip2, ISO, EXE, CAB, PAX

Archive To: 7z, Zip, Tar, Gzip, Bzip2, DMG, ISO

​ 4. iZip, is a simple-to-use, efficient, and powerful utility built for the Mac with compression and encryption technology. iZip allows you to zip, unzip, secure, and share your files. You can save documents directly to a zip file or even drag-and-drop files between archives. iZIp allows browsing photos and videos in Cover Flow mode, viewing a slideshow, and playing videos – without extracting anything from the file you sent.

iZip

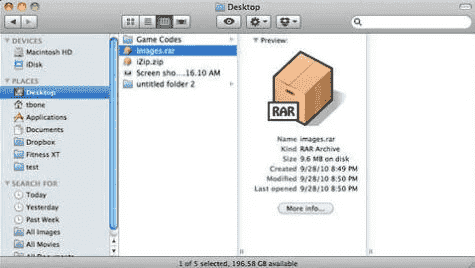
iZip features up to 256-bit AES zip encryption, so you can rest assured unauthorized users will not be able to view any of the confidential information. With iZip, you can share your archive in a few clicks using the tight integration with the beautiful, fast, secure files.com file-sharing service. Securely send and receive files with your friends and colleagues – even those running Windows or Linux.

Key Features:

  • Password protection with AES-256
  • Preview archive content
  • Drag and drop archives

Unarchive From: ZIP, ZIPX, RAR, TAR, TAR.GZ, and 7ZIP.

Actually, for all these tools, if you are a primary user who wants to have the zip/unzip features, I suggest you try Oka Unarchiver](https://okaapps.com/product/1441507725). It has almost all the features you want and is a free trial tool.


Hottest Articles

Latest Articles

Mac System Data Exceeding 200GB? Here’s How to Actually Clear It — A Deep Dive with Heavy Keynote Usage and Time Machine as Examples I. Problem Overview After long-term use, some macOS users discover that “System Data” in Storage Settings grows abnormally large. Common symptoms include: System Data occupying 200GB or more https://cdn.okaapps.com/resource/图2.webp No corresponding files can be located in Finder Deleting caches or log files has little effect Third-party cleaning tools are ineffective Uninstalling and reinstalling apps (such as Keynote) does not help Even after reinstalling macOS, the issue reappears after some time This problem is especially common among heavy productivity users, such as those working extensively with Keynote, Final Cut Pro, or design tools. II. Commonly Tried but Ineffective Solutions Users typically attempt the following methods, most of which fail to solve the problem at its root: Manually deleting directories such as ~/Library/Caches and ~/Library/Logs Using third-party cleaning tools like CleanMyMac or similar utilities Uninstalling and reinstalling Keynote Reinstalling macOS via “Reinstall macOS” These approaches are limited because they do not address the real sources behind System Data inflation. III. What Exactly Is “System Data”? It is important to understand that: System Data is not a real folder, but rather a collection of data that macOS cannot accurately categorize. System Data may include, but is not limited to: macOS system temporary files Application and system caches Portions of the user Library (~/Library) Files Spotlight cannot classify Large resource files inside application packages Local caches from cloud services (such as iCloud or OneDrive) iPhone / iPad backup files Residual data from deleted user accounts Time Machine local snapshots As a result, System Data cannot be reliably inspected or reduced through simple cache deletion or Finder-based browsing. IV. Key Cause #1: Time Machine Local Snapshots Consuming Disk Space How Local Snapshots Work Even when no external drive or NAS is connected, macOS will: https://cdn.okaapps.com/resource/图3.webp Create a Time Machine local snapshot every hour Retain snapshots from the last 24 hours by default If the backup destination remains disconnected, keep local snapshots associated with the most recent full backup These snapshots: Are based on the APFS file system Do not appear as regular files Are entirely counted under System Data In some cases, local snapshots can consume tens or even hundreds of gigabytes. https://cdn.okaapps.com/resource/图4.webp Why They Sometimes Cannot Be Deleted When Time Machine uses a NAS or network storage device as its backup destination, the following situations may occur: The NAS was previously disconnected The network path or IP address changed The backup was not re-“claimed” by the system As a result, macOS may treat these snapshots as belonging to an unreachable backup destination, leading to: tmutil deletion failures Errors such as Stale NFS file handle Snapshots that cannot be reclaimed, causing persistent disk usage V. Key Cause #2: How Keynote and Similar Apps Amplify System Data Keynote itself is not malfunctioning, but its design inherently amplifies System Data usage: Keynote files are actually packages containing large numbers of resources These may include: High-resolution images Embedded videos Fonts Animation and transition assets Spotlight sometimes fails to correctly classify these resources, causing them to be grouped under System Data. For users who frequently create large, media-heavy presentations, steady growth in System Data over time is expected. VI. Effective Solutions (Prioritized) Solution 1: Verify and Restore Time Machine Backup Status (Recommended) Open Disk Utility From the menu bar, select Show APFS Snapshots Select the system Data volume Check whether a large number of Time Machine local snapshots exist If using a NAS as the backup destination: Reconnect the NAS Select the original backup in Time Machine settings Follow the prompts to claim the existing backup Once the backup relationship is properly restored, macOS can automatically manage and reclaim snapshot space. Solution 2: Use Disk Analysis Tools to Identify Real Space Usage It is recommended to use tools that analyze disk usage without automatically deleting files, such as: GrandPerspective EtreCheck The goal is to identify: Which files or directories consume the most space Whether disk usage is abnormally concentrated in specific areas Avoid relying on “one-click cleanup” tools. Solution 3: Check for Residual Data from Old User Accounts If the device previously: Had multiple user accounts Removed accounts without deleting their home folders Then old home directories may still exist and be counted as System Data. Solution 4: Rebuild the System Environment Completely (Last Resort) When System Data usage becomes severely unmanageable and no clear source can be identified, the only definitive solution is: Fully back up all current data Erase the disk and reinstall macOS During setup: Migrate only the user account Do not migrate system settings, applications, or Library data This approach completely removes legacy data structure issues. VII. Long-Term Prevention Tips (for Keynote and Content Creators) Archive older Keynote projects to an external drive or NAS Avoid storing large volumes of presentation files locally for long periods Keep the Time Machine backup destination consistently available Avoid third-party tools that perform automated “system-level cleaning” Periodically monitor disk usage with analysis tools VIII. Conclusion Abnormally large macOS System Data usage is rarely caused by a single cache or log issue. Instead, it is typically the result of Time Machine local snapshots, application package resources, and inherited historical data structures working together. Only by understanding what System Data actually contains—and addressing the root causes—can disk space issues be resolved effectively and long-term.