All-In-One video library & player for iOS/macOS/tvOS
...
Best local and net disk movie/tv player on Mac, creating a local personal media library.
Price reduced to Free Trial!
  • $29.99
  • 0
How do you mirror your Mac's screen or video files on your TV?
  • Oka Assist
  • 2026-02-13 11:06:32


How do you mirror your Mac's screen or video files on your TV?

Here are the steps to mirror your Mac screen or video files to your TV. Before you begin, please install the Oka Mirror app from the Mac App Store. If you haven't installed it, read Mirror Mac screen to Smart TV, Chromecast and Roku.

Find Devices

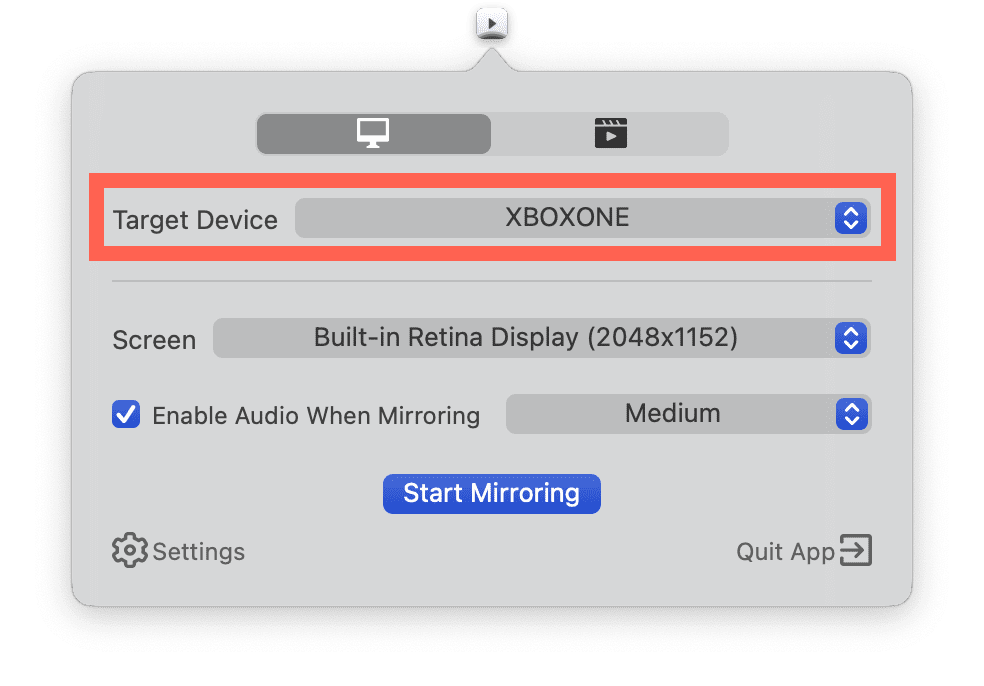
Open the app and click the icon in the status bar. The app will start. At the right-bottom of the screen, there is a device list selection. If you do not find the device in the list, make sure your TV is connected to the same WiFi network as your Mac. If you have a dual-band router, check How do you set up your router to make sure the mirror can work. Also, make sure your TV is set up to allow the connection to your Mac. To find out more details about TV settings, you can check. How do you check your TV's settings for mirror devices? To ensure your Mac is ready for screencasting, Check your Mac's settings to ensure the mirror will work properly.

Oka Mirror Detect DLNA Devices

Screen Mirror and Cast your Mac Desktop to your TV

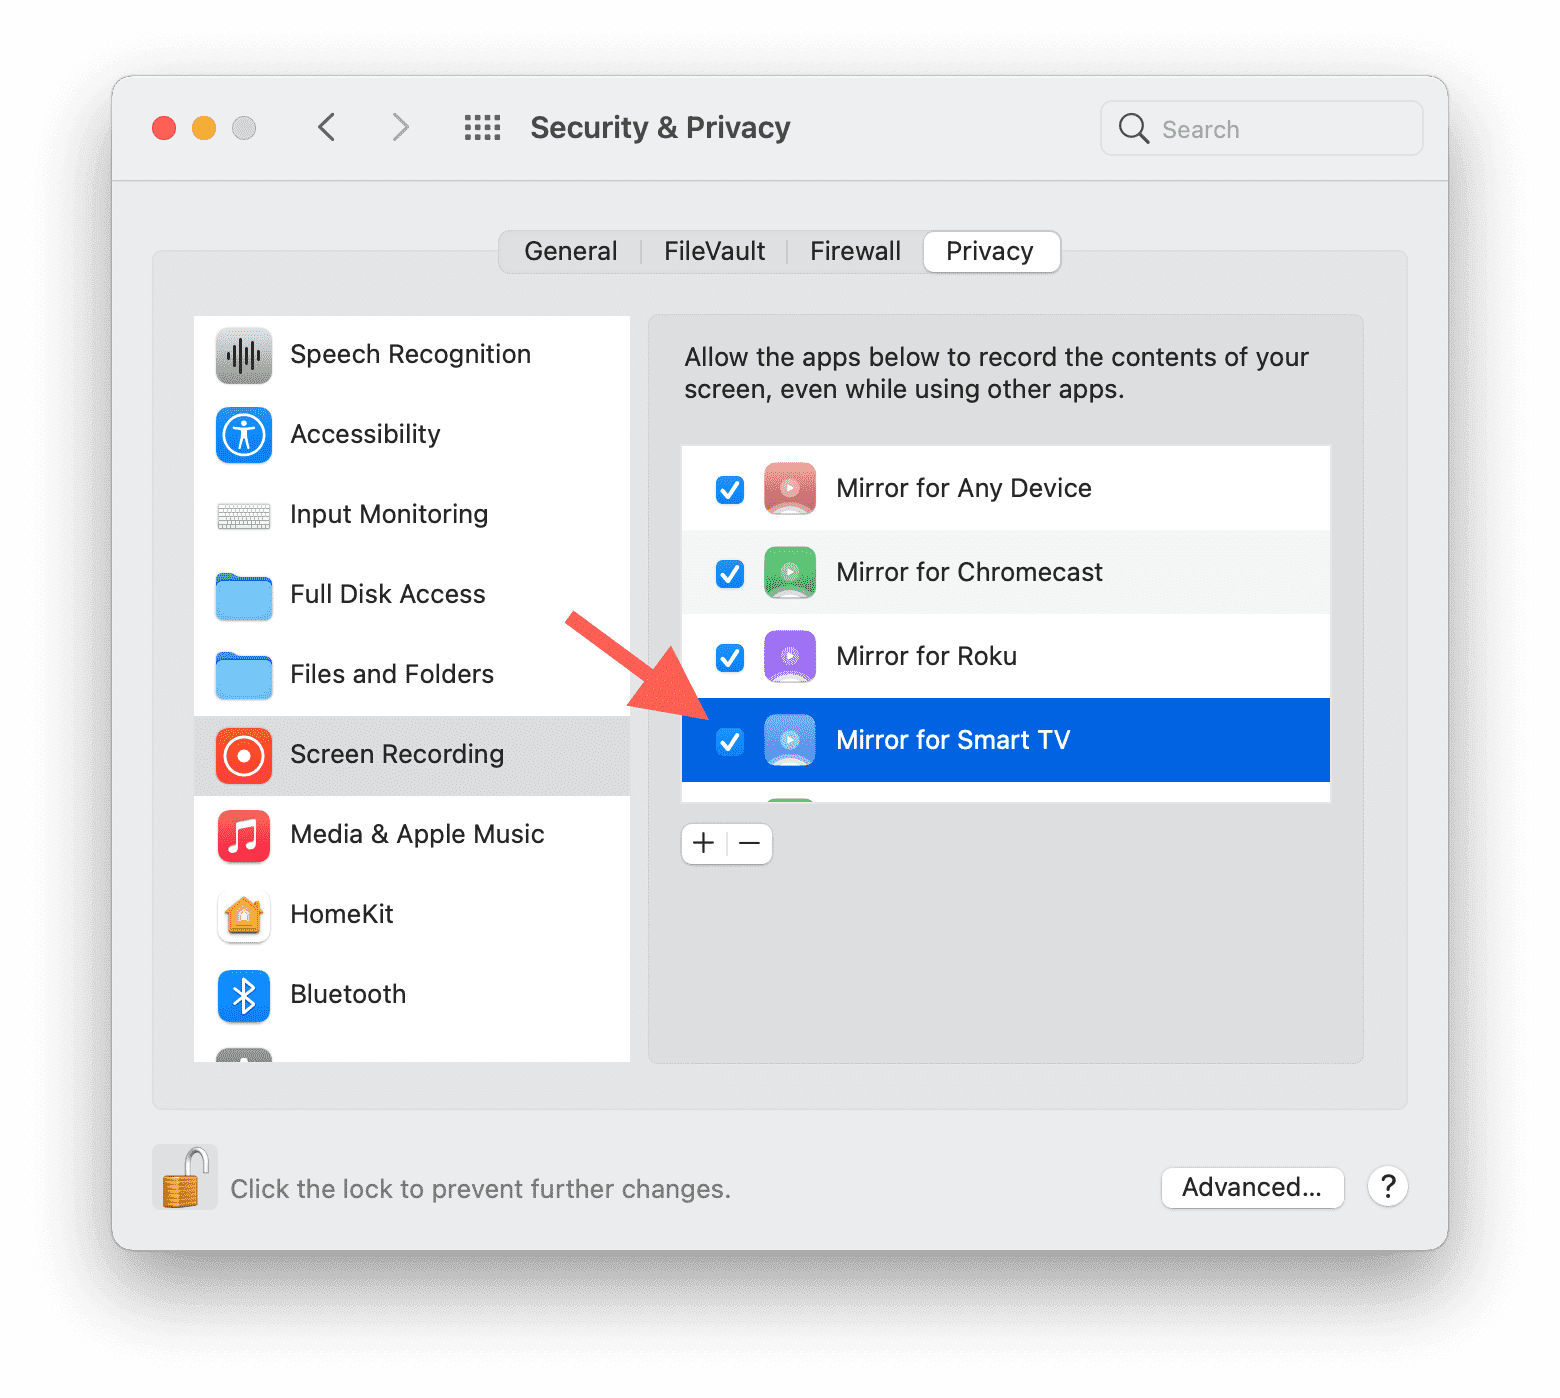
The first time you click "Start Mirroring", you will be asked for permission to record the screen. Please allow this permission for the app. We don’t record your screen, and we don’t send any content anywhere. This is only used to temporarily store data in your device's memory before it is streamed to your TV. After streaming begins, the content is removed from memory. If you have any problems with these steps, check out this blog post:

Oka Mirror Allow Screen Recording Permission

Install the audio driver if you want to stream the audio when you mirror your desktop.

This is not necessary if you don't need to stream audio when you cast your desktop. It should be pointed out that mirroring the audio requires a lot of your Mac's CPU resources and a high-performance WiFi network, therefore the quality is degraded if these resources are not available. You can find how to install the driver in this blog.

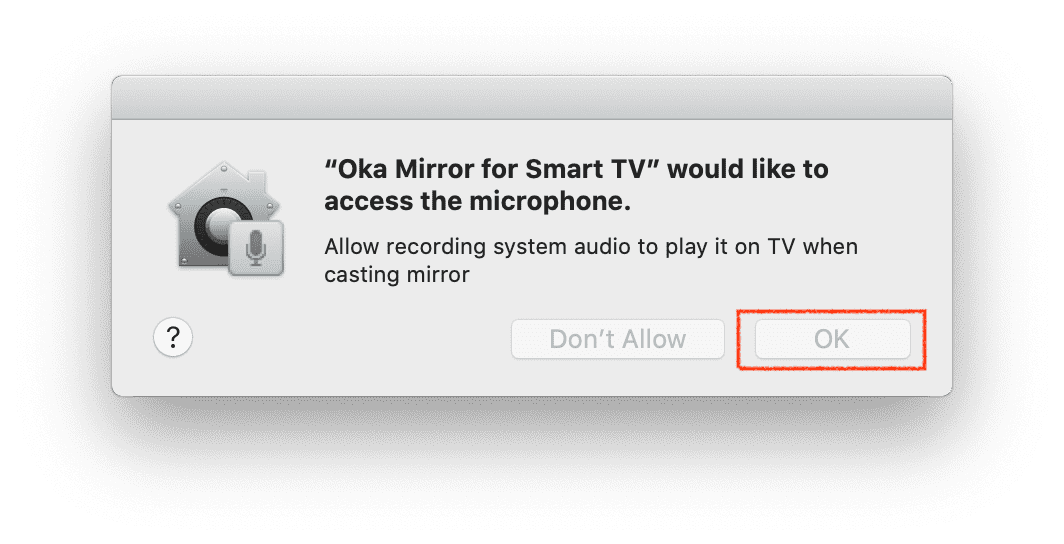
After you have installed the driver, it requires you to allow the Microphone permission. Please allow the request when you see this dialog.

Oka Mirror Allow Microphone Permission to Cast Audio

How about Media Streaming?

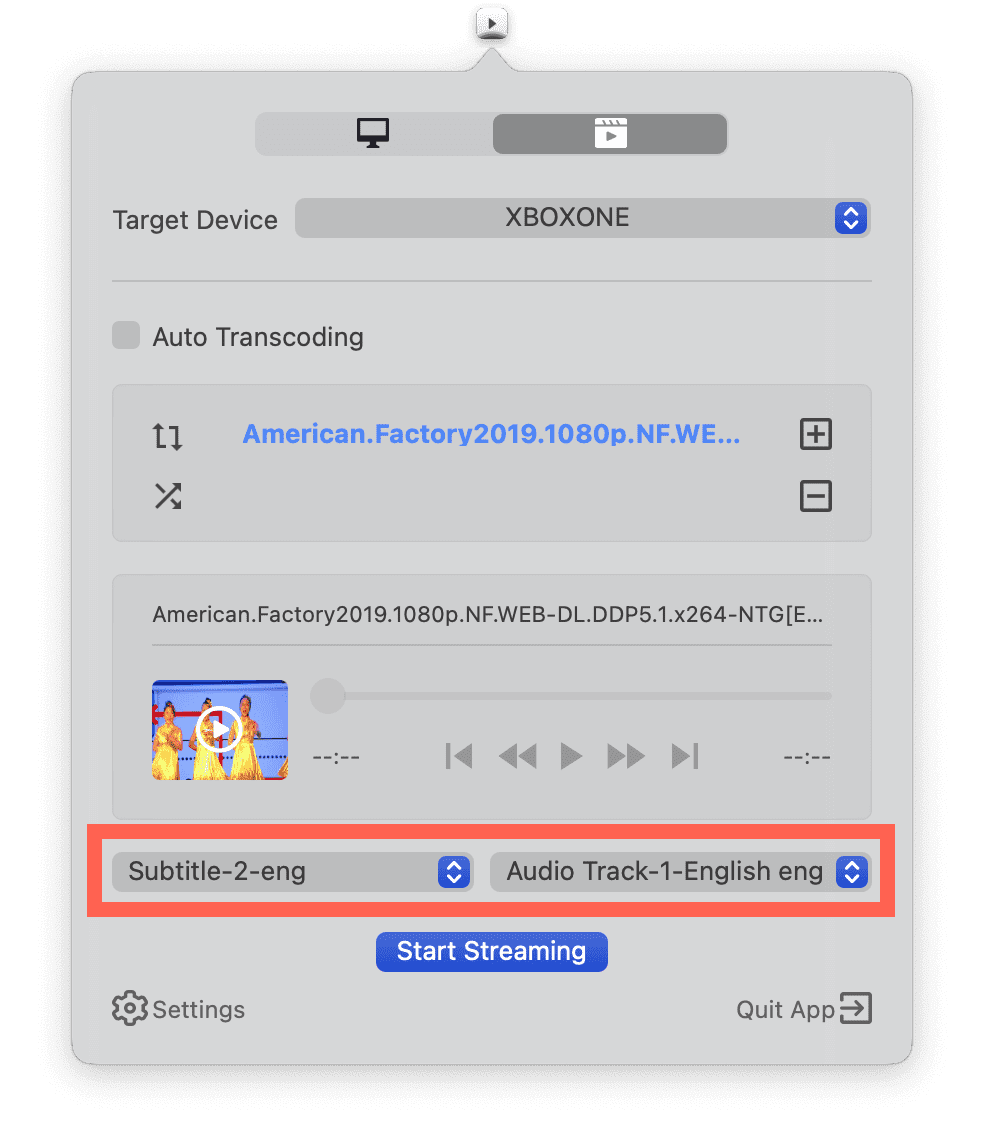
This is very easy, just switch to the Media Streaming tab, add files to the list, then you can start streaming. You can also select the subtitle or audio track. You might notice the Auto Transcoding, If your TV model is older, it may not support the newer video encoding formats. You can try turning on “Auto Transcoding” for better device compatibility, but it will use up more Mac system resources during transcoding.

Oka Mirror Stream Movies to TV with Subtitle

Why can't I still not cast to my TV successfully?

The mirror requires three main devices to be able to cast to your TV - a Mac, a router, and a TV. I like the TV show called the "IT Crowd". If you watch this show, you will know a famous line from Roy, "Have you tried turning it off and on again". Yes, in many cases this will resolve most issues.

it_crowd

Here are some links to the FAQ that may help you troubleshoot your problem:

How to check Mac setting?

How to check Router Wifi setting?

How to check TV setting?


Hottest Articles

Latest Articles

Mac System Data Exceeding 200GB? Here’s How to Actually Clear It — A Deep Dive with Heavy Keynote Usage and Time Machine as Examples I. Problem Overview After long-term use, some macOS users discover that “System Data” in Storage Settings grows abnormally large. Common symptoms include: System Data occupying 200GB or more https://cdn.okaapps.com/resource/图2.webp No corresponding files can be located in Finder Deleting caches or log files has little effect Third-party cleaning tools are ineffective Uninstalling and reinstalling apps (such as Keynote) does not help Even after reinstalling macOS, the issue reappears after some time This problem is especially common among heavy productivity users, such as those working extensively with Keynote, Final Cut Pro, or design tools. II. Commonly Tried but Ineffective Solutions Users typically attempt the following methods, most of which fail to solve the problem at its root: Manually deleting directories such as ~/Library/Caches and ~/Library/Logs Using third-party cleaning tools like CleanMyMac or similar utilities Uninstalling and reinstalling Keynote Reinstalling macOS via “Reinstall macOS” These approaches are limited because they do not address the real sources behind System Data inflation. III. What Exactly Is “System Data”? It is important to understand that: System Data is not a real folder, but rather a collection of data that macOS cannot accurately categorize. System Data may include, but is not limited to: macOS system temporary files Application and system caches Portions of the user Library (~/Library) Files Spotlight cannot classify Large resource files inside application packages Local caches from cloud services (such as iCloud or OneDrive) iPhone / iPad backup files Residual data from deleted user accounts Time Machine local snapshots As a result, System Data cannot be reliably inspected or reduced through simple cache deletion or Finder-based browsing. IV. Key Cause #1: Time Machine Local Snapshots Consuming Disk Space How Local Snapshots Work Even when no external drive or NAS is connected, macOS will: https://cdn.okaapps.com/resource/图3.webp Create a Time Machine local snapshot every hour Retain snapshots from the last 24 hours by default If the backup destination remains disconnected, keep local snapshots associated with the most recent full backup These snapshots: Are based on the APFS file system Do not appear as regular files Are entirely counted under System Data In some cases, local snapshots can consume tens or even hundreds of gigabytes. https://cdn.okaapps.com/resource/图4.webp Why They Sometimes Cannot Be Deleted When Time Machine uses a NAS or network storage device as its backup destination, the following situations may occur: The NAS was previously disconnected The network path or IP address changed The backup was not re-“claimed” by the system As a result, macOS may treat these snapshots as belonging to an unreachable backup destination, leading to: tmutil deletion failures Errors such as Stale NFS file handle Snapshots that cannot be reclaimed, causing persistent disk usage V. Key Cause #2: How Keynote and Similar Apps Amplify System Data Keynote itself is not malfunctioning, but its design inherently amplifies System Data usage: Keynote files are actually packages containing large numbers of resources These may include: High-resolution images Embedded videos Fonts Animation and transition assets Spotlight sometimes fails to correctly classify these resources, causing them to be grouped under System Data. For users who frequently create large, media-heavy presentations, steady growth in System Data over time is expected. VI. Effective Solutions (Prioritized) Solution 1: Verify and Restore Time Machine Backup Status (Recommended) Open Disk Utility From the menu bar, select Show APFS Snapshots Select the system Data volume Check whether a large number of Time Machine local snapshots exist If using a NAS as the backup destination: Reconnect the NAS Select the original backup in Time Machine settings Follow the prompts to claim the existing backup Once the backup relationship is properly restored, macOS can automatically manage and reclaim snapshot space. Solution 2: Use Disk Analysis Tools to Identify Real Space Usage It is recommended to use tools that analyze disk usage without automatically deleting files, such as: GrandPerspective EtreCheck The goal is to identify: Which files or directories consume the most space Whether disk usage is abnormally concentrated in specific areas Avoid relying on “one-click cleanup” tools. Solution 3: Check for Residual Data from Old User Accounts If the device previously: Had multiple user accounts Removed accounts without deleting their home folders Then old home directories may still exist and be counted as System Data. Solution 4: Rebuild the System Environment Completely (Last Resort) When System Data usage becomes severely unmanageable and no clear source can be identified, the only definitive solution is: Fully back up all current data Erase the disk and reinstall macOS During setup: Migrate only the user account Do not migrate system settings, applications, or Library data This approach completely removes legacy data structure issues. VII. Long-Term Prevention Tips (for Keynote and Content Creators) Archive older Keynote projects to an external drive or NAS Avoid storing large volumes of presentation files locally for long periods Keep the Time Machine backup destination consistently available Avoid third-party tools that perform automated “system-level cleaning” Periodically monitor disk usage with analysis tools VIII. Conclusion Abnormally large macOS System Data usage is rarely caused by a single cache or log issue. Instead, it is typically the result of Time Machine local snapshots, application package resources, and inherited historical data structures working together. Only by understanding what System Data actually contains—and addressing the root causes—can disk space issues be resolved effectively and long-term.